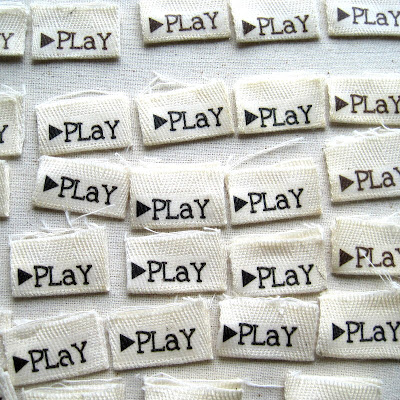
Putting your label on something makes it look So much more professional! I do a few craft shows, and I like to have my design name on a label on my products...but I didn't want to spend a ton of money to get labels made, so I do it myself.
I start with some twill tape (I bought mine on Ebay for .50 cents a yard, from a lady who sells scrapbooking supplies)

My dad helped me make my design label graphic from a canvas print of owls that I made for Everett's room. I put as many as I can possibly fit, as close to each other as possible, I can fit 90 or so of the owl tags, and who knows how many tags that just say "PLaY" on one piece of 81/2 by 11 paper.
You can buy "Print n Press" at Walmart, I think it's around $8 for 5 sheets.
The MOST IMPORTANT part of the paper part is to print it in "Mirror Image" under print settings, that way when you iron on the image, it will look right :)

To make the side tags I cut 1" wide twill tape into 1.5" pieces.

fold them in half and iron flat

cut out the transfer paper labels, and place them carefully onto each piece of twill tape, printed side down

Iron them in place

peel off the paper and VOILA! You have your very own tags!!! CUTE!!!
{NEVER iron the tags after this, it will melt off and ruin your iron. You can wash and dry them like normal though! :)}

Place them onto any garment or homemade item you can imagine!

They really make your handmade things look so professional!

These are some of the 1" labels waiting to be cut out of the transfer paper, so you can see how close together they were placed when printed, also you can see that they are mirrored :)

To make these ones, I place them less than 1/2" apart, then I draw a line of fray check in between each label and cut them apart with pinking shears (Zig-zag scissors)

Pants...Binky Clips...


Blankets...shoes...

Pretty much everything :) So easy right? And much cheaper than ordering them!
{The "PLaY" and Owl logos are trademarked, please do NOT copy}
Linking up:


so cute!!! I wondered how you made those! Thanks for sharing!
ReplyDeleteHow easy. I love your logos!
ReplyDeleteWhat a great idea. Now I can make my own, and not be out a fortune!
ReplyDeleteLove these!
ReplyDeleteKristy from www.apronsandapples.blogspot.com
Hi! I tried following this tutorial and the 'Quick Fuse'I used (same as print n' press) was a white cotton fabric when ironed on and was not see through. Also, it didn't need to be reversed. I like how yours is clear so you can see the twill in the background. Do you have any suggestions? Do they still make it in the clear form? Thanks!
ReplyDeleteLizziewestfall1@gmail.com