Sunday, May 29, 2011

Glass Jars and more chalkboard vinyl labels

I bought these awesome jars at downeast, but they had been glass etched, and monogrammed. Now I could have just turned them around so the monogrammed side was facing the back, but I think it would have bugged me too much. So, more chalkboard vinyl labels! YAY!
They have GREAT potential! They were $10, $5, and $2.50

A little cleaning and some nice crisp white bathroom supplies, and cute chalkboard vinyl labels, and ...

TA DAAA!

I really love them (NO natural light in the bathroom=less than ideal photos, but you get the idea :)


I love how they all look together, so clean, and uniform. Sigh...


Aaaand, I also bought this jar at Walmart (UNDER $7!!!) and put my Oxi clean it it, and spray painted a tin rectangle to put dryer sheets in, and put them all in a basket I got at the DI. (Also no light in the laundry room, so I took these in the bedroom, but you get the idea.)
I also want to put a place in the basket for change and pocket treasures, and maybe even a trash can to keep dryer lint...
Nice.

HERE are more of my chalkboard vinyl labels...in the kitchen :)

Linking up:

Friday, May 27, 2011

Above the Kitchen Cabinets...YUM

I have to be honest, I have anxiety about what to put above the kitchen cabinets. People do SUCH cute things up there, but mine is small-ish, and I do NOT feel like arranging stuff like little knick knacks is a strength of mine, and neither is buying them.

At Hobby Lobby, these ultra thick (3 layers) chipboard letters were on sale 1/2 price, making them $1 each. So I bought letters to spell "YUM"...I've seen people do "EAT" a lot before, but I like this little different twist...

I looked everywhere for some BOLD scrapbook paper to modge podge onto the letters, but everything was too small of a print, and not quite the right color. So, after I sprayed the letters white, I cut out some chevrons, quatrefoils, and dots onto freezer paper with my cricut and sort of ironed them onto the chipboard {a word of advice, just a quick press will do the trick, any more than that and it will be hard to peel the paper off of the chipboard...but without a good press, the paint will bleed} After I ironed down the freezer paper, I did 2 VERY LIGHT coats of Krylons "Ocean Breeze" Spray paint. Then I peeled off the paper, and VOILA!!! YUM!
I love it! In this photo, the letters are balancing on the cabinet moulding...gonna have to come up with a more permanent fix for that, I was just so excited to take a picture though! :) Now I need some greenery, vase/pot, plate, who knows! Any suggestions?!
{I didn't take a picture of the whole kitchen because it's not clean...just keepin it real...}
Do you have space for cutesy stuff above your cabinet? What do you do with it?!

Thursday, May 26, 2011

Chalkboard Labels

I cut out some chalkboard vinyl into different sized bracket tags with my cricut and "Sure Cuts A Lot", and I have been a labeling FOOL! It's SO fun, and they look SO cute!!!

{I bought the chalkboard vinyl from Roberts, and used a 40% off coupon. Also I bought "Bistro Chalk Markers from Hobby Lobby, it was $10 for a set of four colors...I didn't want four colors, but using my 40% off coupon was cheaper than ordering the one white one online}
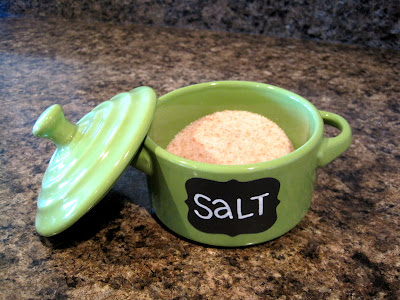
Yes, that is PiNK salt :) Himalayan Sea Salt to be exact, supposed to be better for you, the hubbs insists on it :) I call it princess salt...
Lookit how cute! All lined up so neatly
I love these containers {From the container store, LOVE that place}
And I LOVE the way they look alltogether, Love the way the white stands out, much better than actual chalk. And if I ever want to switch things around, the chalk marker wipes off with water!
I need to get a few more containers, but I am LOVING IT!!! What do you think?
Oh, and also, I finally put up my Welcome Vinyl on the front door, I LOVE IT SO MUCH! It makes me so happy, that little bird just tickles my fancy, every time I look at it, I just LOVE it. So...welcoming hahaha...
{Bought the sign on GroopDealz (like groupon, for crafty stuff, if you don't subscribe, you totally should, and on that note, you should also sign up for "Pick Your Plum" I look forward to their stuff every morning) I have not received any compensation from GroopDealz or Pick Your Plum, I just LOVE them!}
Sigh. I love it. Slowly but surely this house is becoming our HOME...
Stay tuned for more labeling madness lol!!!

Tuesday, May 24, 2011

making my own labels

Putting your label on something makes it look So much more professional! I do a few craft shows, and I like to have my design name on a label on my products...but I didn't want to spend a ton of money to get labels made, so I do it myself.

I start with some twill tape (I bought mine on Ebay for .50 cents a yard, from a lady who sells scrapbooking supplies)
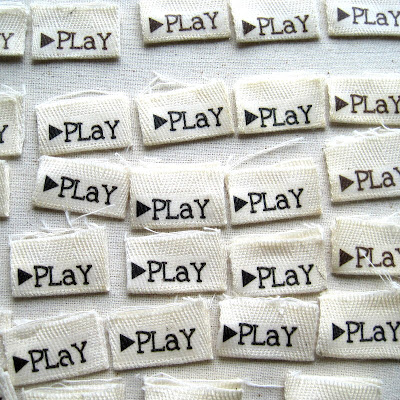
My dad helped me make my design label graphic from a canvas print of owls that I made for Everett's room. I put as many as I can possibly fit, as close to each other as possible, I can fit 90 or so of the owl tags, and who knows how many tags that just say "PLaY" on one piece of 81/2 by 11 paper.

You can buy "Print n Press" at Walmart, I think it's around $8 for 5 sheets.

The MOST IMPORTANT part of the paper part is to print it in "Mirror Image" under print settings, that way when you iron on the image, it will look right :)
To make the side tags I cut 1" wide twill tape into 1.5" pieces.
fold them in half and iron flat
cut out the transfer paper labels, and place them carefully onto each piece of twill tape, printed side down
Iron them in place
peel off the paper and VOILA! You have your very own tags!!! CUTE!!!
{NEVER iron the tags after this, it will melt off and ruin your iron. You can wash and dry them like normal though! :)}
Place them onto any garment or homemade item you can imagine!
They really make your handmade things look so professional!
These are some of the 1" labels waiting to be cut out of the transfer paper, so you can see how close together they were placed when printed, also you can see that they are mirrored :)
To make these ones, I place them less than 1/2" apart, then I draw a line of fray check in between each label and cut them apart with pinking shears (Zig-zag scissors)

I have so much fun putting them on everything I make!
Pants...Binky Clips...
Blankets...shoes...
Pretty much everything :) So easy right? And much cheaper than ordering them!

{The "PLaY" and Owl logos are trademarked, please do NOT copy}

Linking up:

Monday, May 23, 2011

Modified Tunic ikat Top


So, I found this tunic at Walmart on clearance for $3. I like the ikat print, I think it's totally bohemian cool...but it fits kind of like...a muumuu...so I changed it to fit a little more flattering!
Glamourous before shot, see how it kind of makes me look bigger than I am...

So first I cut the neck, because I think a square neck is more flattering.
Then I added some muslin as a lining and sewed it together, keeping the small v that was left over from the original neckline.
I also used elastic thread in the back to cinch it up and bit and make it more fitted (I didn't take a photo of that process...)

And now, it looks MUUUUCH better!
Altered neckline
shirred back (I just did 5 rows that were 6-7 inches long, about 1/2 inch apart)
And, much better! Nice and fitted, still flowy and comfy, perfect for a summer time barbecue! Not bad for $3, right?

Wednesday, May 18, 2011

Suspenders for the little man: a Tutorial


These suspenders literally took me TEN MINUTES, I timed myself, that's 10 minutes to make them and to take photos for this tutorial! That's fast. They are SOOOO easy and adorable!!!

This is what you'll need (I used "swimsuit elastic" because it's a natural color that will match khaki pants, and it's super soft!)
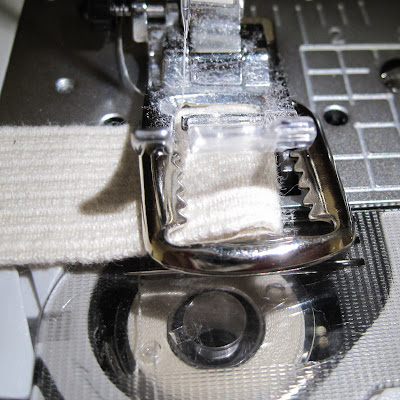
Step 1: thread one vest buckle like pictured and fold it under to hide the raw edge
Put your needle in the LEFT needle position and sew that baby down, be sure to back stitch at the start and end
It looks like this
Step 2: Thread the suspender clip through the elastic and vest buckle


Step 3: Attach another suspender clip to the other end of the elastic by threading it through an inch or so, and folding under to hide the raw edge. Sew that down.
Now, REPEaT for the other elastic strip. Now you'll have 2 that look this this, (below)
Step 4: Cross your elastic pieces and pin them in place, make sure they are even and sew a diamond shape to hold them together
Look closely to see the stitching :)

And.......... TADAAAAAAAAA You're done! That was QUICK right?!
Put em on your little man and admire what a charmer he is! DARLING no?
Instead of using elastic you could use strips of fabric (I would recommend putting interfacing in them), to match a particular tie, or for a fun occasion. I made these for a local photographer who was photographing twins on their first birthday...uhhhh....CUTE!!!
{note: the 27 inches will fit a child 2-5 ish. for my little Everett who is 10 months old right now, and for the suspenders above for the 1 year old babies, I cut the elastic (or fabric) to be 24 inches.}