Showing posts with label Labels. Show all posts

Monday, October 3, 2011

Labels for Jenni

I know I have been MIA for, well, too long...but I am back. I don't make any promises as to how often I will post, but definitely more than the last few months :)

During nap time today, I whipped up a batch of labels for my SIL Jenni, she requested some cute labels to put on the things she sews her three little munchkins. All her outfits are DARLING! See??!! This is just one of the most recent ones!
I was happy to oblige, the least I could do after she took our family photos last time she was here, she's also an amazing photographer! See??? Awe, cute.
She wanted some girly-and some boyly...
{no I don't think that is a word, but my six year old niece Lily says it all the time }
...with owls and monkeys, I threw in the tricycle ones for fun :)

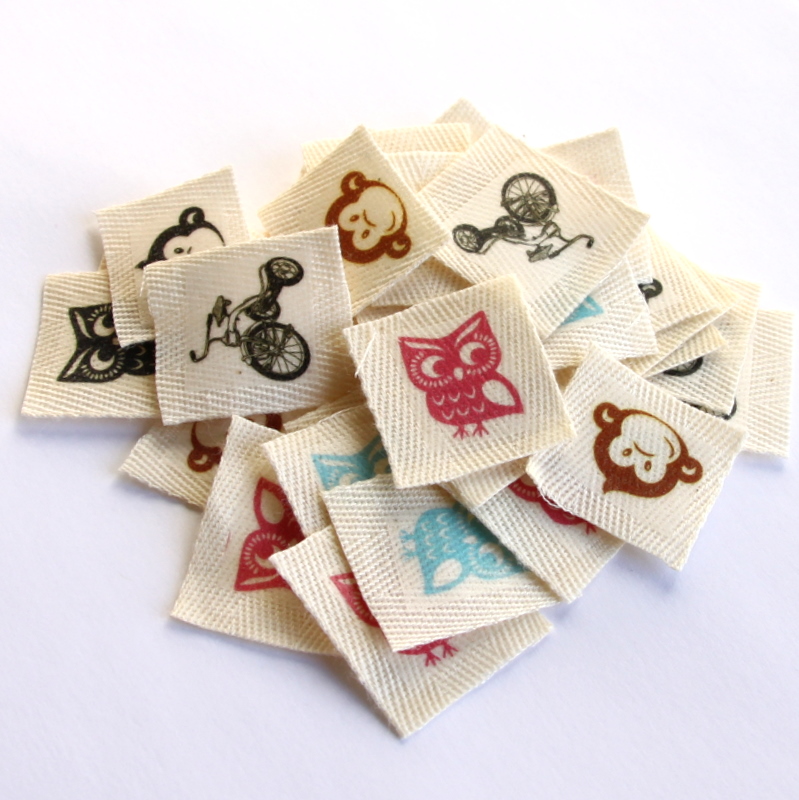
In case you forgot, I used this tutorial here :)

Thanks for giving me the excuse to make these darling labels Jenni!

Sunday, May 29, 2011

Glass Jars and more chalkboard vinyl labels

I bought these awesome jars at downeast, but they had been glass etched, and monogrammed. Now I could have just turned them around so the monogrammed side was facing the back, but I think it would have bugged me too much. So, more chalkboard vinyl labels! YAY!
They have GREAT potential! They were $10, $5, and $2.50

A little cleaning and some nice crisp white bathroom supplies, and cute chalkboard vinyl labels, and ...

TA DAAA!

I really love them (NO natural light in the bathroom=less than ideal photos, but you get the idea :)


I love how they all look together, so clean, and uniform. Sigh...


Aaaand, I also bought this jar at Walmart (UNDER $7!!!) and put my Oxi clean it it, and spray painted a tin rectangle to put dryer sheets in, and put them all in a basket I got at the DI. (Also no light in the laundry room, so I took these in the bedroom, but you get the idea.)
I also want to put a place in the basket for change and pocket treasures, and maybe even a trash can to keep dryer lint...
Nice.

HERE are more of my chalkboard vinyl labels...in the kitchen :)

Linking up:

Thursday, May 26, 2011

Chalkboard Labels

I cut out some chalkboard vinyl into different sized bracket tags with my cricut and "Sure Cuts A Lot", and I have been a labeling FOOL! It's SO fun, and they look SO cute!!!

{I bought the chalkboard vinyl from Roberts, and used a 40% off coupon. Also I bought "Bistro Chalk Markers from Hobby Lobby, it was $10 for a set of four colors...I didn't want four colors, but using my 40% off coupon was cheaper than ordering the one white one online}
Yes, that is PiNK salt :) Himalayan Sea Salt to be exact, supposed to be better for you, the hubbs insists on it :) I call it princess salt...
Lookit how cute! All lined up so neatly
I love these containers {From the container store, LOVE that place}
And I LOVE the way they look alltogether, Love the way the white stands out, much better than actual chalk. And if I ever want to switch things around, the chalk marker wipes off with water!
I need to get a few more containers, but I am LOVING IT!!! What do you think?
Oh, and also, I finally put up my Welcome Vinyl on the front door, I LOVE IT SO MUCH! It makes me so happy, that little bird just tickles my fancy, every time I look at it, I just LOVE it. So...welcoming hahaha...
{Bought the sign on GroopDealz (like groupon, for crafty stuff, if you don't subscribe, you totally should, and on that note, you should also sign up for "Pick Your Plum" I look forward to their stuff every morning) I have not received any compensation from GroopDealz or Pick Your Plum, I just LOVE them!}
Sigh. I love it. Slowly but surely this house is becoming our HOME...
Stay tuned for more labeling madness lol!!!

Tuesday, May 24, 2011

making my own labels

Putting your label on something makes it look So much more professional! I do a few craft shows, and I like to have my design name on a label on my products...but I didn't want to spend a ton of money to get labels made, so I do it myself.

I start with some twill tape (I bought mine on Ebay for .50 cents a yard, from a lady who sells scrapbooking supplies)
My dad helped me make my design label graphic from a canvas print of owls that I made for Everett's room. I put as many as I can possibly fit, as close to each other as possible, I can fit 90 or so of the owl tags, and who knows how many tags that just say "PLaY" on one piece of 81/2 by 11 paper.

You can buy "Print n Press" at Walmart, I think it's around $8 for 5 sheets.

The MOST IMPORTANT part of the paper part is to print it in "Mirror Image" under print settings, that way when you iron on the image, it will look right :)
To make the side tags I cut 1" wide twill tape into 1.5" pieces.
fold them in half and iron flat
cut out the transfer paper labels, and place them carefully onto each piece of twill tape, printed side down
Iron them in place
peel off the paper and VOILA! You have your very own tags!!! CUTE!!!
{NEVER iron the tags after this, it will melt off and ruin your iron. You can wash and dry them like normal though! :)}
Place them onto any garment or homemade item you can imagine!
They really make your handmade things look so professional!
These are some of the 1" labels waiting to be cut out of the transfer paper, so you can see how close together they were placed when printed, also you can see that they are mirrored :)
To make these ones, I place them less than 1/2" apart, then I draw a line of fray check in between each label and cut them apart with pinking shears (Zig-zag scissors)

I have so much fun putting them on everything I make!
Pants...Binky Clips...
Blankets...shoes...
Pretty much everything :) So easy right? And much cheaper than ordering them!

{The "PLaY" and Owl logos are trademarked, please do NOT copy}

Linking up: